Chapter 11: Deployment
In this chapter, we will deploy the application to the internet so other people can visit it.
There are two broad approaches: managing a physical or virtual server yourself, usually running Linux, or using a hosting platform that takes care of services such as the web server and database. With a managed platform, you upload your code and configure the application. We will deploy to PythonAnywhere.
Hosting update — September 2026 The workflow and screenshots below come from the original tutorial. PythonAnywhere's current free-account documentation lists a one-month web-app expiry, rather than the three-month interval described in the source. MySQL and daily scheduled tasks are only available to older free accounts created before January 15, 2026 (January 8 on the EU system), or on eligible paid plans. This tutorial uses SQLite. Check your dashboard for the applicable renewal date and available features.
Prepare for deployment
First, record the installed dependencies so they can be installed on the server:
(.venv) $ pip freeze > requirements.txt
Some settings need different values in production. Here is the production configuration class introduced earlier:
class ProductionConfig(BaseConfig):
    SQLALCHEMY_DATABASE_URI = os.getenv('DATABASE_URL', SQLITE_PREFIX + str(BASE_DIR / 'data.db').lstrip('/'))
We will keep using SQLite, so the example uses a different database filename in production. The SECRET_KEY inherited from BaseConfig also needs a random value:
class BaseConfig:
    SECRET_KEY = os.getenv('SECRET_KEY', 'dev')
Set the real value through an environment variable instead of putting it in source code. In the next section, we will create a new .env file on the server containing SECRET_KEY.
Deployment does not use Flask's development server, so we need to load .env explicitly with python-dotenv. Create wsgi.py in the project root as the production entry point. It loads the environment and creates the application:
wsgi.py: load environment variables and create the application
import os

from dotenv import load_dotenv

dotenv_path = os.path.join(os.path.dirname(__file__), '.env')
if os.path.exists(dotenv_path):
    load_dotenv(dotenv_path)

from watchlist import create_app

app = create_app(config_name='production')
Commit the changes and push them to GitHub:
$ git add .
$ git commit -m "Ready to deploy"
$ git push
Deploy with PythonAnywhere
Visit the sign-up page and create a free account. Your username becomes both your Linux username and part of your application's subdomain. For example, greyli gets http://greyli.pythonanywhere.com/.
After signing up, follow or skip the introductory tour. The dashboard looks like this:
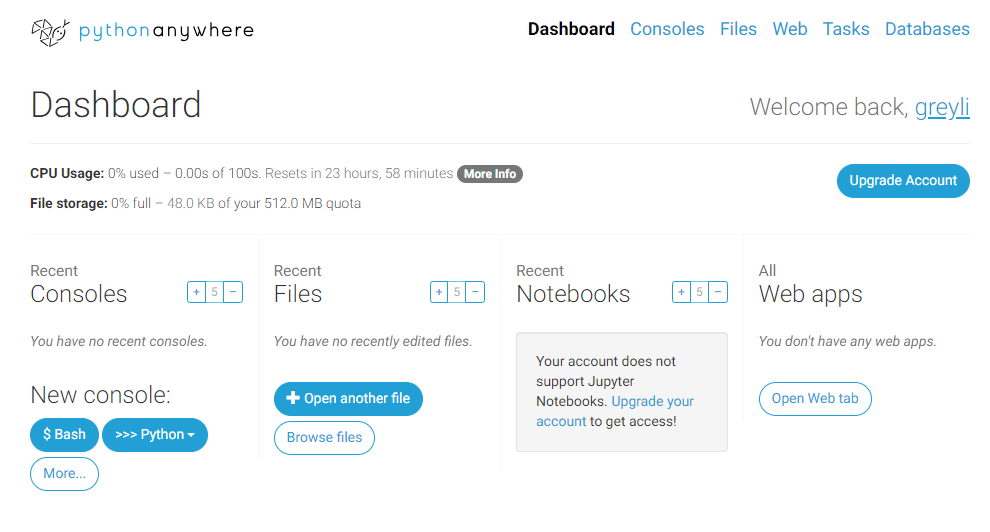
The navigation links open these panels:
- Consoles: open Bash, Python, MySQL, and other consoles, where supported by your account.
- Files: create, delete, edit, and upload files, including application code.
- Web: manage web applications.
- Tasks: manage scheduled tasks, where available.
- Databases: configure databases. The source describes MySQL on free accounts; see the hosting update above for current eligibility.
Some of these features are also accessible directly from the dashboard.
Open Web through the navigation link or the “Open Web tab” button:
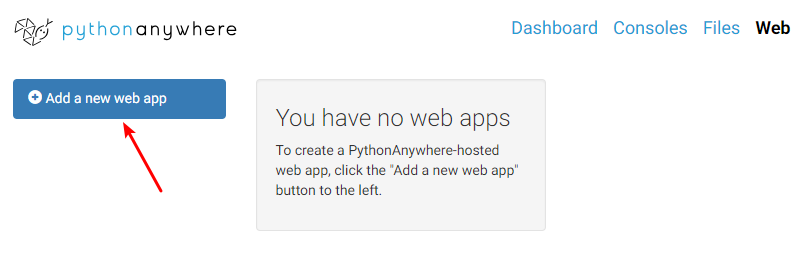
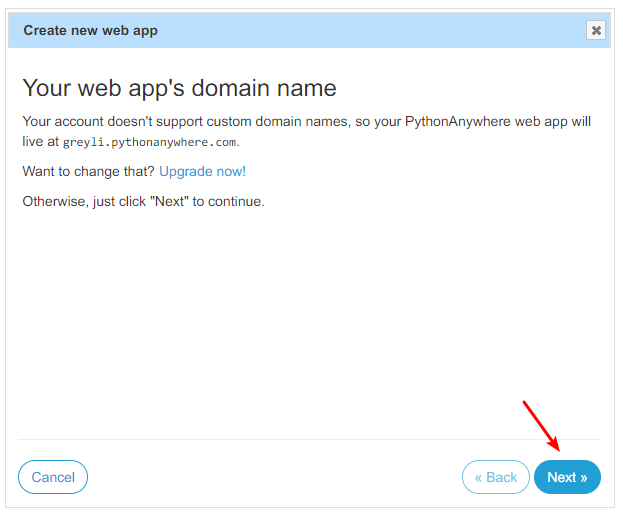
Click “Add a new web app”. The first screen explains that a custom domain requires an upgrade. Click “Next”:
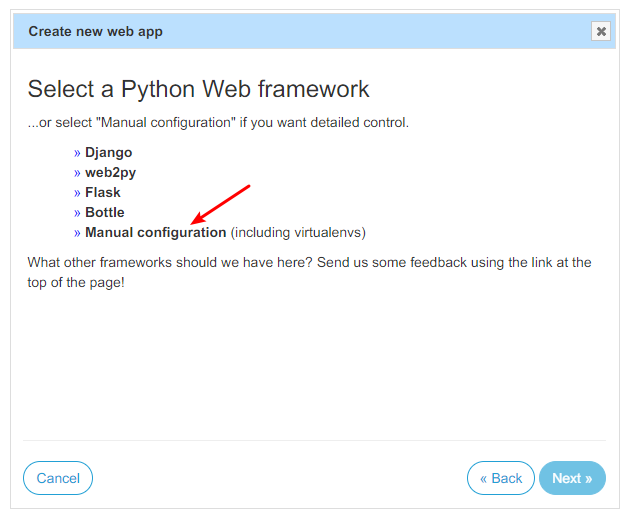
Choose “Manual configuration” on the framework selection screen for more control:
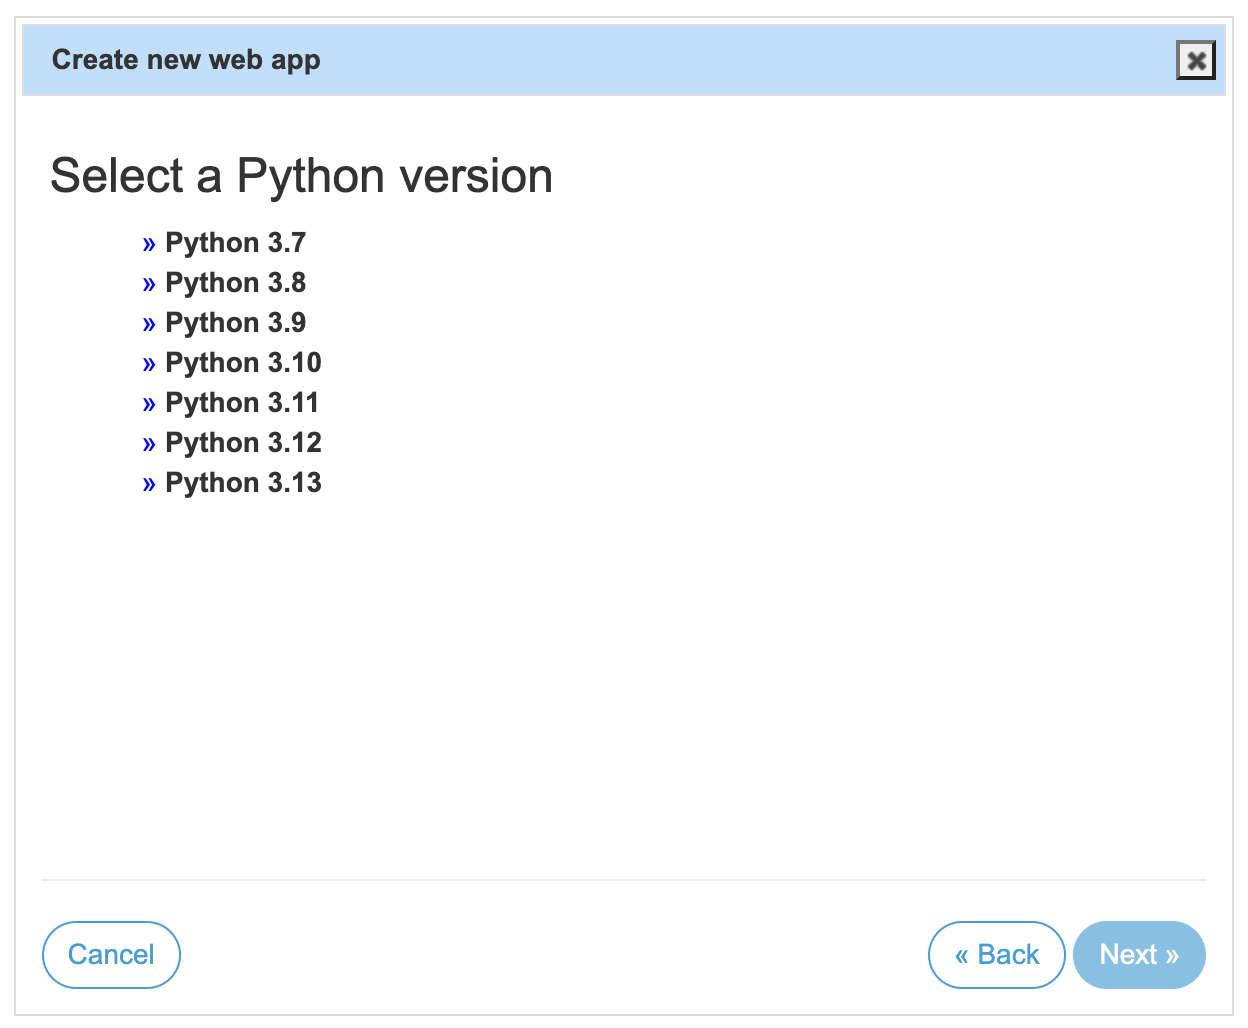
Choose a Python version, at least 3.9:
Click “Next” to finish creating the web application:
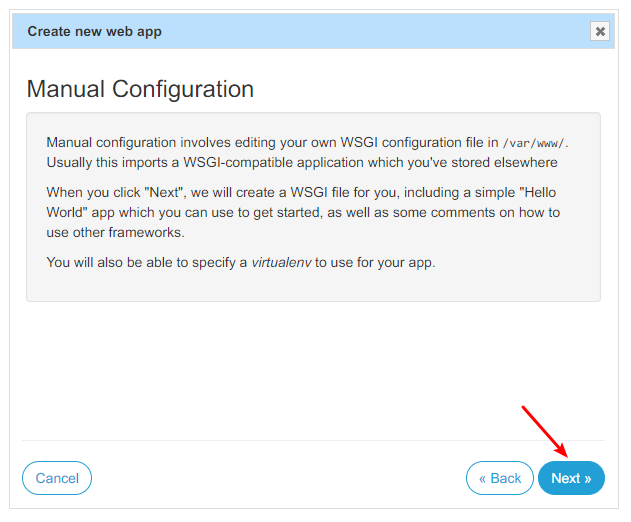
We will initialize the application first, then return to the Web panel to configure it.
Initialize the application environment
There are two common ways to upload the code:
- Pull it from GitHub.
- Create an archive locally and upload it through the Files panel.
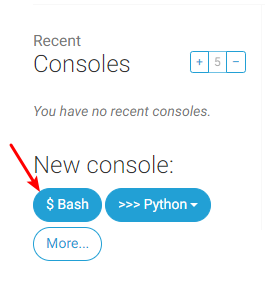
Since our code is already on GitHub, we will use the first approach. Open a Bash console from the dashboard or Consoles panel. Run the following commands there:
$ git clone https://github.com/helloflask/watchlist  # Replace this with your repository URL
$ cd watchlist  # Enter the application repository
This clones the application into your home directory, at /home/your-pythonanywhere-username/your-repository-name, such as /home/greyli/watchlist.
Replace helloflask with your GitHub username and watchlist with your repository name in the clone URL.
Tip For a private repository, the source recommends adding the server's SSH public key to GitHub; see chapter 1's SSH key instructions. SSH authentication requires an SSH clone URL rather than the HTTPS URL shown above. Free accounts restrict outbound protocols, so HTTPS with token-based GitHub authentication may be needed instead; consult its Git guidance.
Create .env in the project root on PythonAnywhere for production environment variables. Generate a random secret locally using Python's uuid module:
$ python3
>>> import uuid
>>> uuid.uuid4().hex
'3d6f45a5fc12445dbac2f59c3b6c7cb1'
Copy your generated value, then return to the PythonAnywhere console and create .env:
$ nano .env
Enter the setting below, replacing the example with your own generated value. Save with Control + O, Enter, and exit with Control + X:
SECRET_KEY=3d6f45a5fc12445dbac2f59c3b6c7cb1
Install dependencies and initialize the application:
$ python3 -m venv .venv  # Create a virtual environment
$ source .venv/bin/activate  # Activate the virtual environment
(.venv) $ pip install -r requirements.txt  # Install all dependencies
(.venv) $ flask init-db  # Initialize the database; alternatively run flask forge for sample data
(.venv) $ flask admin  # Create the administrator account
Use the same Python version for the virtual environment and the Web application, as required by the official Flask setup guide. If python3 selects a different version, use the matching versioned executable instead.
Your console should look similar to this screenshot, which omits the last two commands:
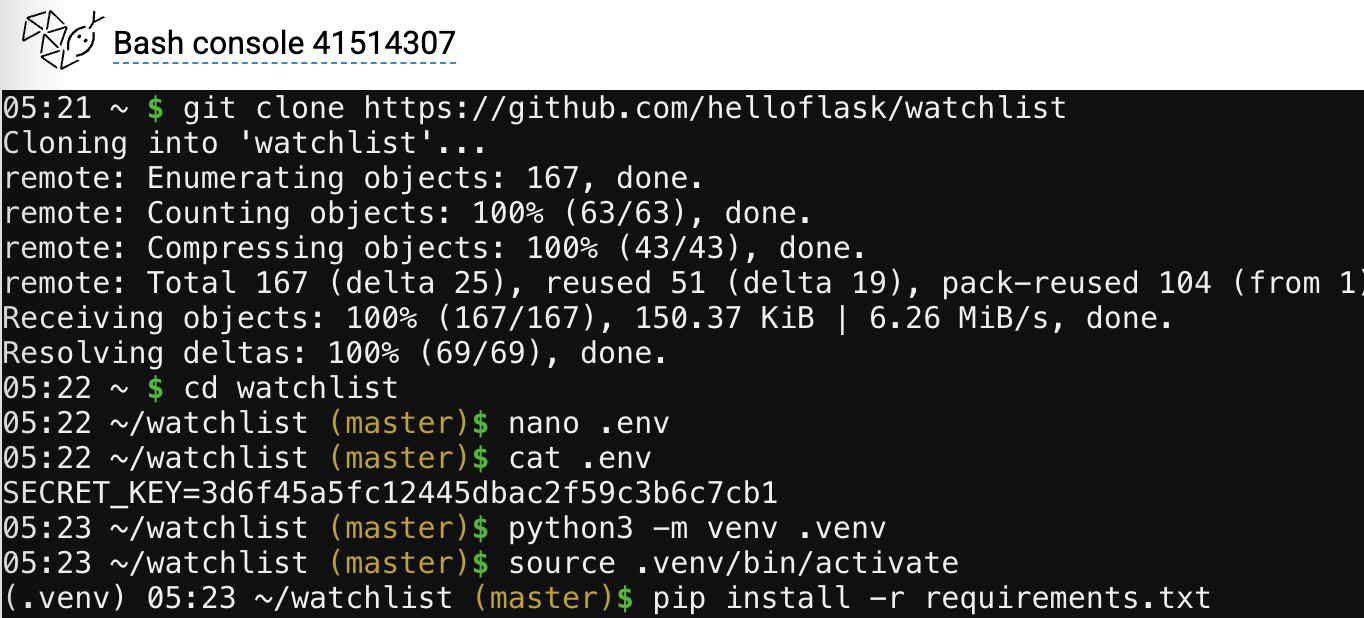
Keep this tab open for later commands. Use the menu at the top right to open the Web panel in another browser tab.
Configure and start the application
The code is ready. A few Web-panel settings remain.
Code
Start with the Code section:
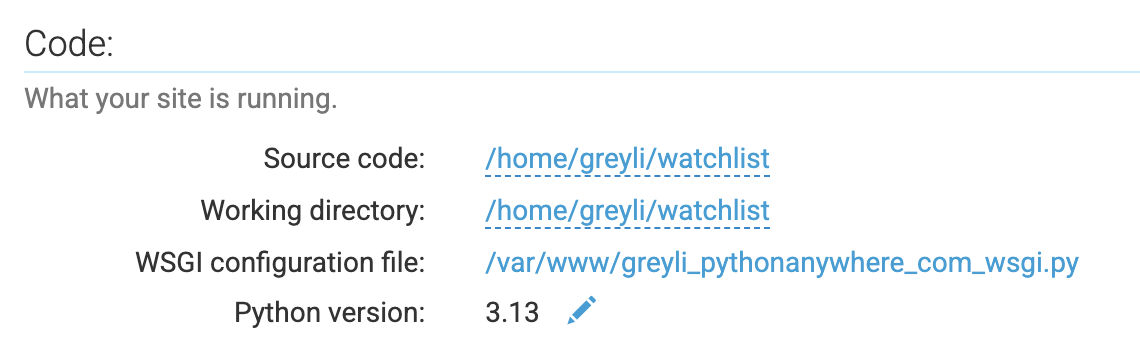
Set Source code and Working directory to the project root, following /home/username/project-directory.
Open the WSGI configuration file link. Replace its contents with:
import sys

path = '/home/greyli/watchlist'  # Use /home/your-username/project-directory
if path not in sys.path:
    sys.path.append(path)

from wsgi import app as application
Save with the green Save button or Ctrl + S, then return to the Web panel through the top-right menu.
PythonAnywhere imports an object named application from this file. We therefore import app from our project's wsgi module under that name.
Virtual environment
Enter the virtual environment's full path in the Virtualenv section:
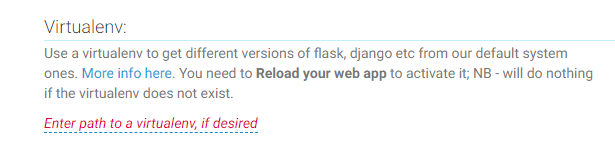
For our example, it is /home/greyli/watchlist/.venv/. Replace the username, project name, and environment name as needed. Click the red link in the Virtualenv section, enter the path, and save.
Static files
PythonAnywhere's web server can serve static files more efficiently than routing them through the application. In Static files, map the URL to the corresponding directory:
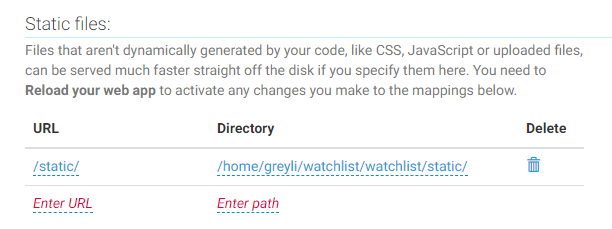
Use /static/ for the URL and the static directory inside the application package, such as /home/greyli/watchlist/watchlist/static/. Update the username and project directory to match yours.
Start the application
Click the green Reload button to apply the configuration:
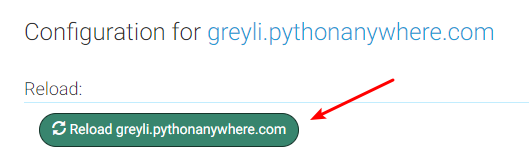
Visit the application URL shown at the top of the Web panel, such as https://greyli.pythonanywhere.com. Its format is https://your-username.pythonanywhere.com.
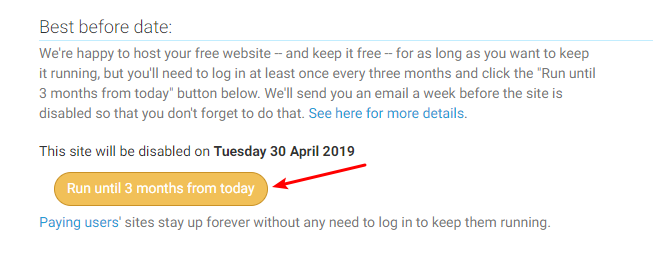
Free applications require periodic renewal through the yellow button. The source describes a three-month interval and an email reminder before expiry; use the current expiry date shown in your dashboard, as explained in the hosting update above.
Update a deployed application
After making changes locally and passing the tests, push the code to GitHub. Open a Bash console on PythonAnywhere, enter the project directory, and pull the changes:
$ cd watchlist
$ git pull
Perform any necessary follow-up steps, such as installing new dependencies, then click Reload in the Web panel.
Chapter summary
With the application online, you can keep adding features or start a new project. The book is nearing its end, but your learning is just beginning: it covers the essentials needed to start using Flask, with plenty more to explore. The afterword recommends further reading.
One challenge still awaits you in chapter 12.
Going further
- PythonAnywhere lets you manage files, edit code, and run commands online, so you can also use it as a development environment while learning.
- The Web panel includes more settings: Log files shows application logs, Traffic shows usage, and Security provides options for forcing HTTPS and adding password protection.
- If your account supports PythonAnywhere's MySQL service, create a database in Databases and set the production database URI. Its MySQL documentation describes a five-minute idle connection timeout. Set the connection pool's recycling interval below 300 seconds, for example:
app.config['SQLALCHEMY_ENGINE_OPTIONS'] = {'pool_size' : 100, 'pool_recycle' : 280}