Chapter 8: User authentication
Most of the application's features are now in place, but one important piece is missing: authentication. The Edit and Delete buttons are visible to everyone. If we deployed the application now, anyone could edit or delete entries, which is clearly not what we want.
In this chapter, we will add authentication and distinguish between two kinds of users. The administrator signs in with a username and password and can change data; visitors can only browse. First, let's look at how to store passwords safely.
Store passwords securely
Storing plain-text passwords in a database is dangerous. If an attacker steals the database, the usernames and passwords are exposed immediately. A safer approach is to compute a password hash for each password and store that instead. The hash is designed to be difficult to reverse to recover the password.
Werkzeug, one of Flask's dependencies, provides functions for generating and checking password hashes. werkzeug.security.generate_password_hash() hashes a password, and werkzeug.security.check_password_hash() checks whether a supplied password matches a stored hash:
>>> from werkzeug.security import generate_password_hash, check_password_hash
>>> pw_hash = generate_password_hash('dog')  # Generate a hash for the password dog
>>> pw_hash  # Inspect the password hash
'pbkdf2:sha256:50000$mm9UPTRI$ee68ebc71434a4405a28d34ae3f170757fb424663dc0ca15198cb881edc0978f'
>>> check_password_hash(pw_hash, 'dog')  # Check whether the hash matches dog
True
>>> check_password_hash(pw_hash, 'cat')  # Check whether the hash matches cat
False
The exact hash format depends on the Werkzeug version; the output above is illustrative.
Add username and password_hash fields to the User model to store the login name and password hash. Also add methods for setting and checking the password:
from typing import Optional

from sqlalchemy import String
from sqlalchemy.orm import Mapped, mapped_column
from werkzeug.security import generate_password_hash, check_password_hash


class User(db.Model):
    __tablename__ = 'user' # Set the table name
    id: Mapped[int] = mapped_column(primary_key=True)  # Primary key
    name: Mapped[str] = mapped_column(String(20))  # Name
    username: Mapped[str] = mapped_column(String(20))  # Username
    password_hash: Mapped[Optional[str]] = mapped_column(String(256))  # Password hash

    def set_password(self, password):  # Set the password; accept the plain-text password
        self.password_hash = generate_password_hash(password)  # Store the generated hash in the field

    def validate_password(self, password):  # Check the supplied password
        return check_password_hash(self.password_hash, password)  # Return a Boolean
The hash is only generated when set_password() is called, so mark the field as optional with Optional:
from typing import Optional

password_hash: Mapped[Optional[str]] = mapped_column(String(256))
In Python 3.10 or later, you can use a pipe and None instead:
password_hash: Mapped[str | None] = mapped_column(String(256))
Because the models—and therefore the table structure—have changed, recreate the database. This clears existing data:
(.venv) $ flask init-db --drop
Also update forge() to populate the new fields when creating the user:
user = User(name=name, username='admin')
user.set_password('helloflask')
Create the administrator account
Since this application has only one user account, we do not need a registration page. Instead, write a command to create the administrator account:
from sqlalchemy import select
import click


@app.cli.command()
@click.option('--username', prompt=True, help='The username used to login.')
@click.option('--password', prompt=True, hide_input=True, confirmation_prompt=True, help='The password used to login.')
def admin(username, password):
    """Create user."""
    db.create_all()

    user = db.session.execute(select(User)).scalar()
    if user is not None:
        click.echo('Updating user...')
        user.username = username
        user.set_password(password)  # Set the password
    else:
        click.echo('Creating user...')
        user = User(username=username, name='Admin')
        user.set_password(password)  # Set the password
        db.session.add(user)

    db.session.commit()  # Commit the database session
    click.echo('Done.')
The two click.option() decorators define options for the username and password. Run flask admin and enter the requested values to create the account. If an account already exists, the command updates it:
(.venv) $ flask admin
Username: greyli
Password: 123  # hide_input=True hides the password as you type
Repeat for confirmation: 123  # confirmation_prompt=True asks you to enter it again
Updating user...
Done.
Authenticate users with Flask-Login
The Flask-Login extension provides the tools we need for authentication. Install it first:
(.venv) $ pip install flask-login
Initialization involves an extra step: besides creating the extension instance, we need a user loader callback:
app.py: initialize Flask-Login
from flask_login import LoginManager

login_manager = LoginManager(app)  # Create the extension instance

@login_manager.user_loader
def load_user(user_id):  # Load a user by ID
    user = db.session.get(User, int(user_id))  # Look up the User by primary key
    return user  # Return the user object
Flask-Login provides current_user to access the current user's information. The loader retrieves that user's database record. Once a user is logged in, Flask-Login calls this function when it needs to load the user, making the result available through current_user.
The User model also needs to inherit from Flask-Login's UserMixin:
from flask_login import UserMixin


class User(db.Model, UserMixin):
    # ...
This supplies properties and methods for checking authentication status. The one we use most often is is_authenticated: current_user.is_authenticated is True when the current user is logged in, and False otherwise. Together with current_user, these helpers make it easy to check authentication.
Log in
Call Flask-Login's login_user() with a user model instance to log that user in. Here is the view that displays the login page and handles its form submissions:
app.py: log in a user
from flask_login import login_user

# ...

@app.route('/login', methods=['GET', 'POST'])
def login():
    if request.method == 'POST':
        username = request.form.get('username')
        password = request.form.get('password')

        if not username or not password:
            flash('Invalid input.')
            return redirect(url_for('login'))

        user = db.session.execute(select(User).filter_by(username=username)).scalar()
        # Check the password
        if user is not None and user.validate_password(password):
            login_user(user)  # Log the user in
            flash('Login success.')
            return redirect(url_for('index'))  # Redirect to the home page

        flash('Invalid username or password.')  # Show an error if authentication fails
        return redirect(url_for('login'))  # Redirect to the login page

    return render_template('login.html')
Here is the login page template:
templates/login.html: the login page
{% extends 'base.html' %}

{% block content %}
<h3>Login</h3>
<form method="post">
    Username<br>
    <input type="text" name="username" required><br><br>
    Password<br>
    <!-- type="password" masks the entered characters -->
    <input type="password" name="password" required><br><br>
    <input class="btn" type="submit" name="submit" value="Submit">
</form>
{% endblock %}
Log out
To log a user out, call logout_user():
from flask_login import login_required, logout_user

# ...

@app.route('/logout')
@login_required  # Protect this view; explained below
def logout():
    logout_user()  # Log the user out
    flash('Goodbye.')
    return redirect(url_for('index'))  # Redirect to the home page
Now that we have login and logout views, let's protect the application before adding their links to the navigation bar.
Protect access with authentication
Some pages and URLs should only be accessible to logged-in users. Some page content should also be hidden from visitors. These are two parts of protecting the application with authentication.
Protect views
Users who are not logged in must not be able to:
- Visit the edit page
- Visit the settings page
- Log out
- Delete entries
- Add new entries
Add login_required to a view to prevent unauthenticated users from accessing it. For example, protect the delete view like this:
@app.route('/movie/delete/<int:movie_id>', methods=['POST'])
@login_required  # Require authentication
def delete(movie_id):
    movie = db.get_or_404(Movie, movie_id)
    db.session.delete(movie)
    db.session.commit()
    flash('Item deleted.')
    return redirect(url_for('index'))
Flask-Login will redirect an unauthenticated visitor to the login page and display a message. To tell it where that page is, set login_manager.login_view to the login view's endpoint. Put this line below the creation of login_manager:
login_manager.login_view = 'login'
Tip You can customize the message with
login_manager.login_message.
Protect the edit view in the same way:
@app.route('/movie/edit/<int:movie_id>', methods=['GET', 'POST'])
@login_required
def edit(movie_id):
    # ...
Creating entries needs slightly different handling. The home page view handles both GET requests to display the page and POST requests to add entries. Visitors should still be able to view the page, so we cannot apply login_required to the whole view. Instead, check authentication inside the POST branch:
from flask_login import login_required, current_user

# ...

@app.route('/', methods=['GET', 'POST'])
def index():
    if request.method == 'POST':
        if not current_user.is_authenticated:  # If the current user is not authenticated
            return redirect(url_for('index'))  # Redirect to the home page
        # ...
Finally, add a settings page where the user can change their display name:
app.py: let the user change their name
from flask_login import login_required, current_user

# ...

@app.route('/settings', methods=['GET', 'POST'])
@login_required
def settings():
    if request.method == 'POST':
        name = request.form.get('name')

        if not name or len(name) > 20:
            flash('Invalid input.')
            return redirect(url_for('settings'))

        current_user.name = name  # Update the current user's name
        # current_user provides the database object for the logged-in user
        # Equivalent to the following
        # user = db.session.get(User, current_user.id)
        # user.name = name
        db.session.commit()
        flash('Settings updated.')
        return redirect(url_for('index'))

    return render_template('settings.html')
Here is its template:
templates/settings.html: the settings page template
{% extends 'base.html' %}

{% block content %}
<h3>Settings</h3>
<form method="post">
    Your Name <input type="text" name="name" autocomplete="off" required value="{{ current_user.name }}">
    <input class="btn" type="submit" name="submit" value="Save">
</form>
{% endblock %}
Protect template content
The other part of authentication protection is controlling what templates display. Visitors should not see:
- The form for adding entries
- Edit buttons
- Delete buttons
These elements are all in index.html. Wrap the creation form in an if statement:
<!-- current_user is available directly in templates -->
{% if current_user.is_authenticated %}
<form method="post">
    Name <input type="text" name="title" autocomplete="off" required>
    Year <input type="text" name="year" autocomplete="off" required>
    <input class="btn" type="submit" name="submit" value="Add">
</form>
{% endif %}
When rendering the template, Jinja checks current_user.is_authenticated. If it is False, the HTML between {% if ... %} and {% endif %} is not rendered. Apply the same check to the Edit and Delete buttons:
{% if current_user.is_authenticated %}
    <a class="btn" href="{{ url_for('edit', movie_id=movie.id) }}">Edit</a>
    <form class="inline-form" method="post" action="{{ url_for('.delete', movie_id=movie.id) }}">
        <input class="btn" type="submit" name="delete" value="Delete" onclick="return confirm('Are you sure?')">
    </form>
{% endif %}
Other parts of the page should display different content depending on authentication. In the base template's navigation, show Settings and Logout to logged-in users, and Login to visitors:
{% if current_user.is_authenticated %}
    <li><a href="{{ url_for('settings') }}">Settings</a></li>
    <li><a href="{{ url_for('logout') }}">Logout</a></li>
{% else %}
    <li><a href="{{ url_for('login') }}">Login</a></li>
{% endif %}
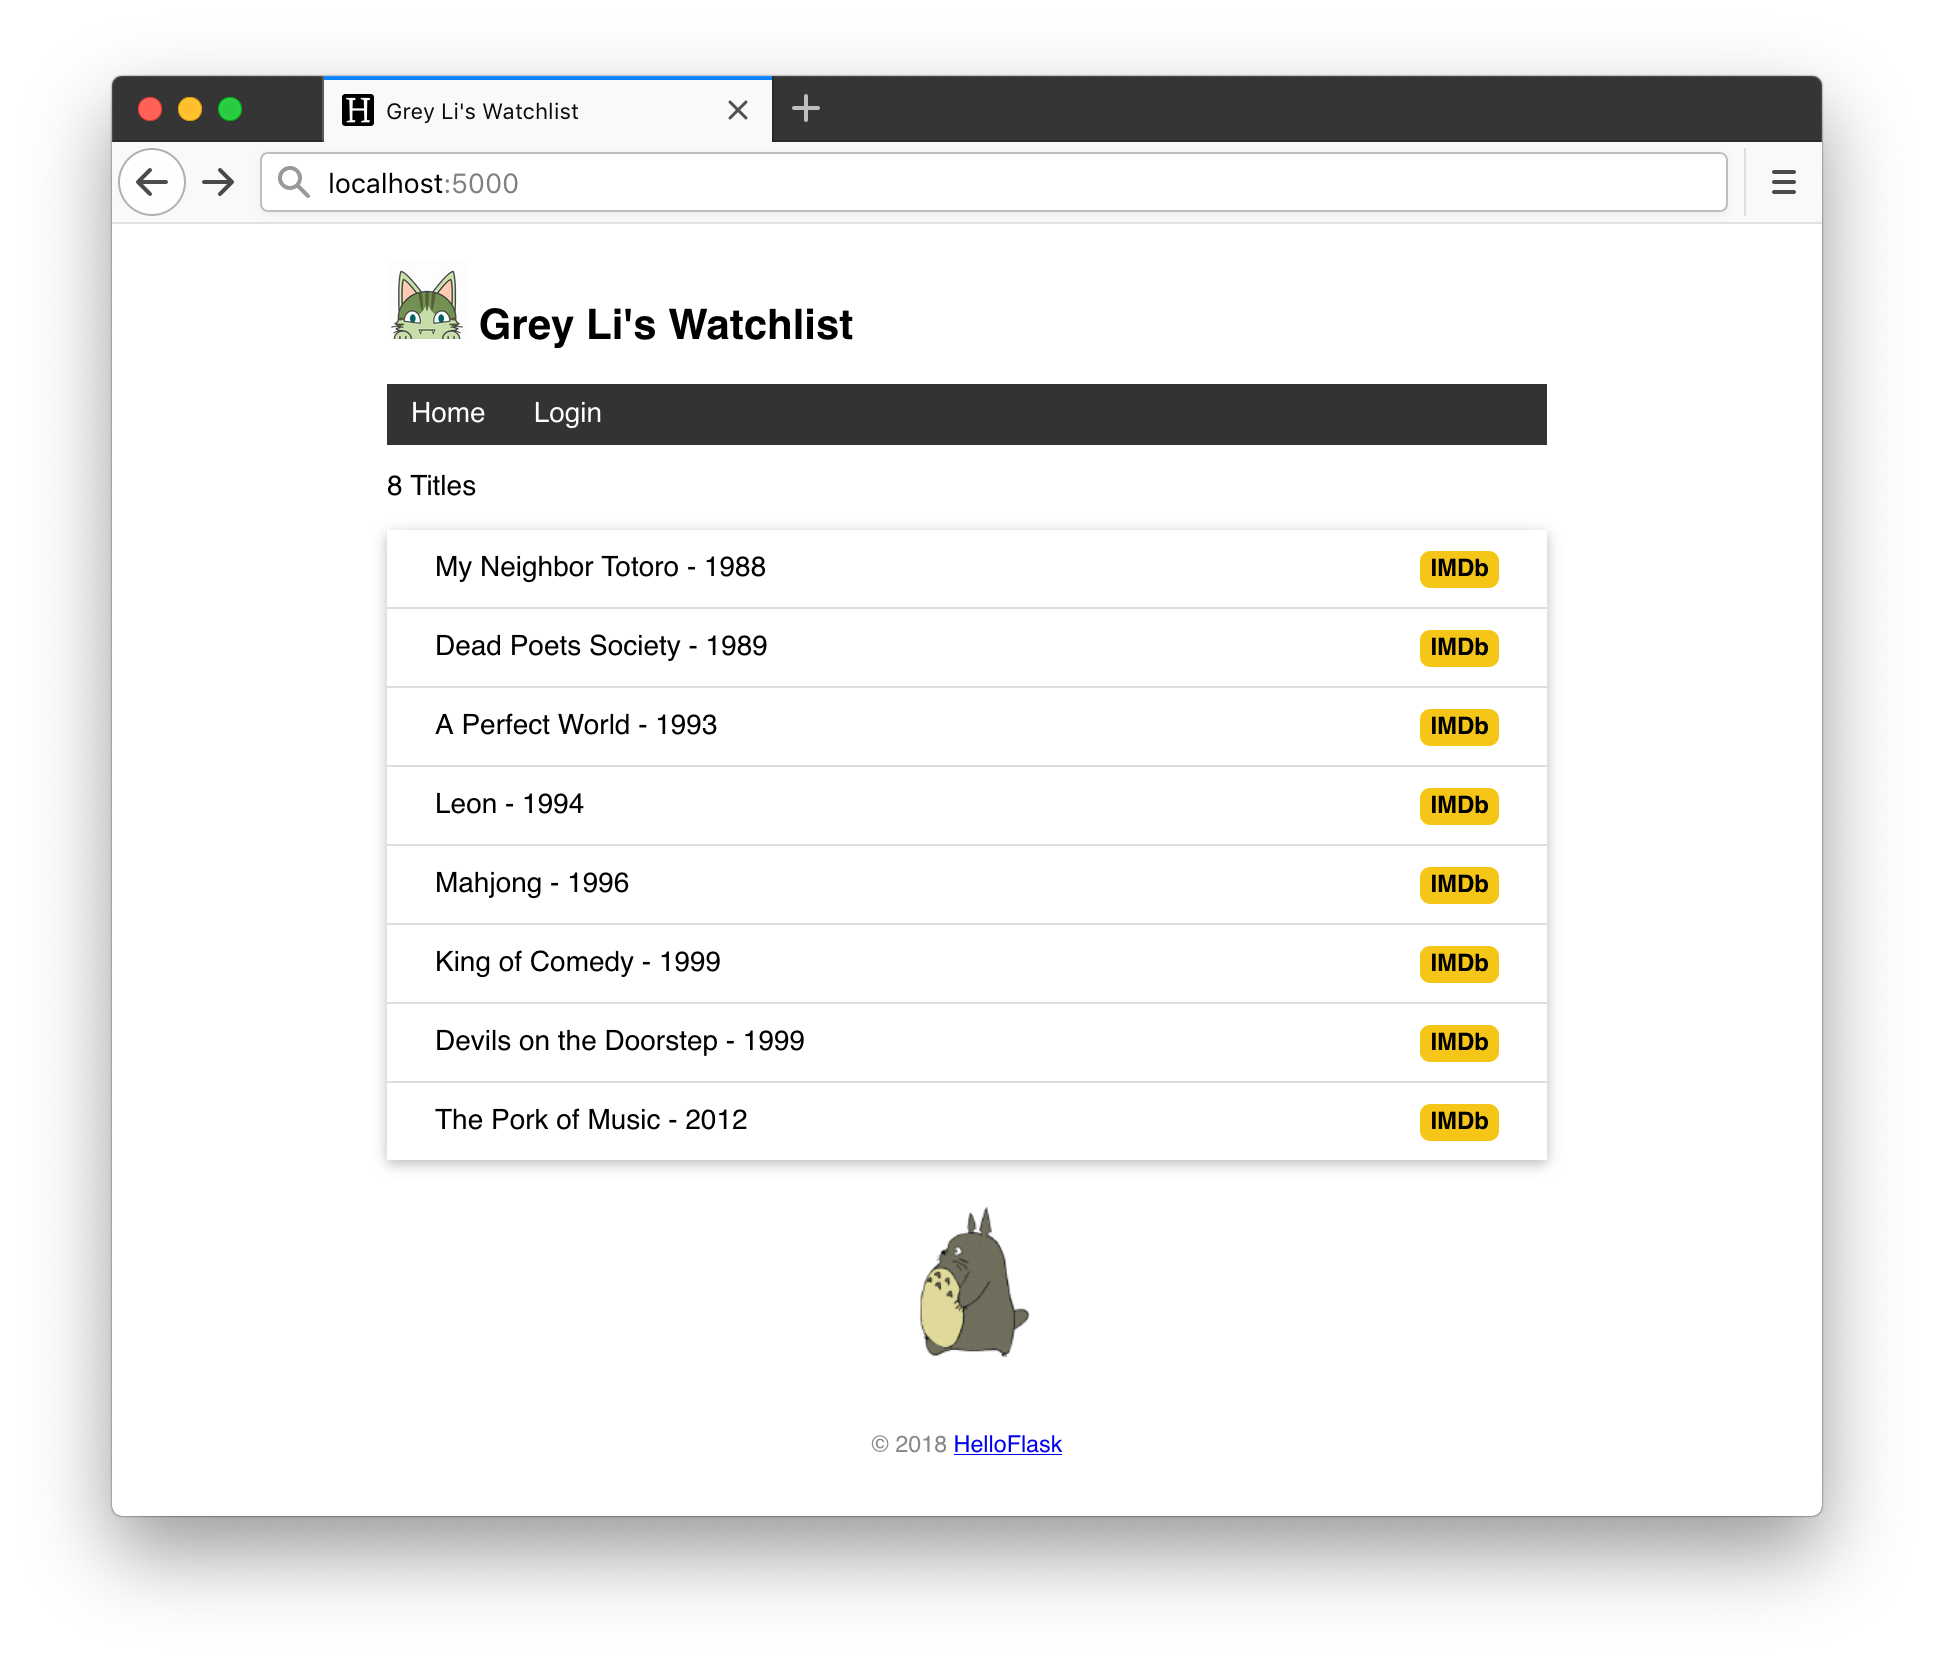
A visitor now sees this home page:
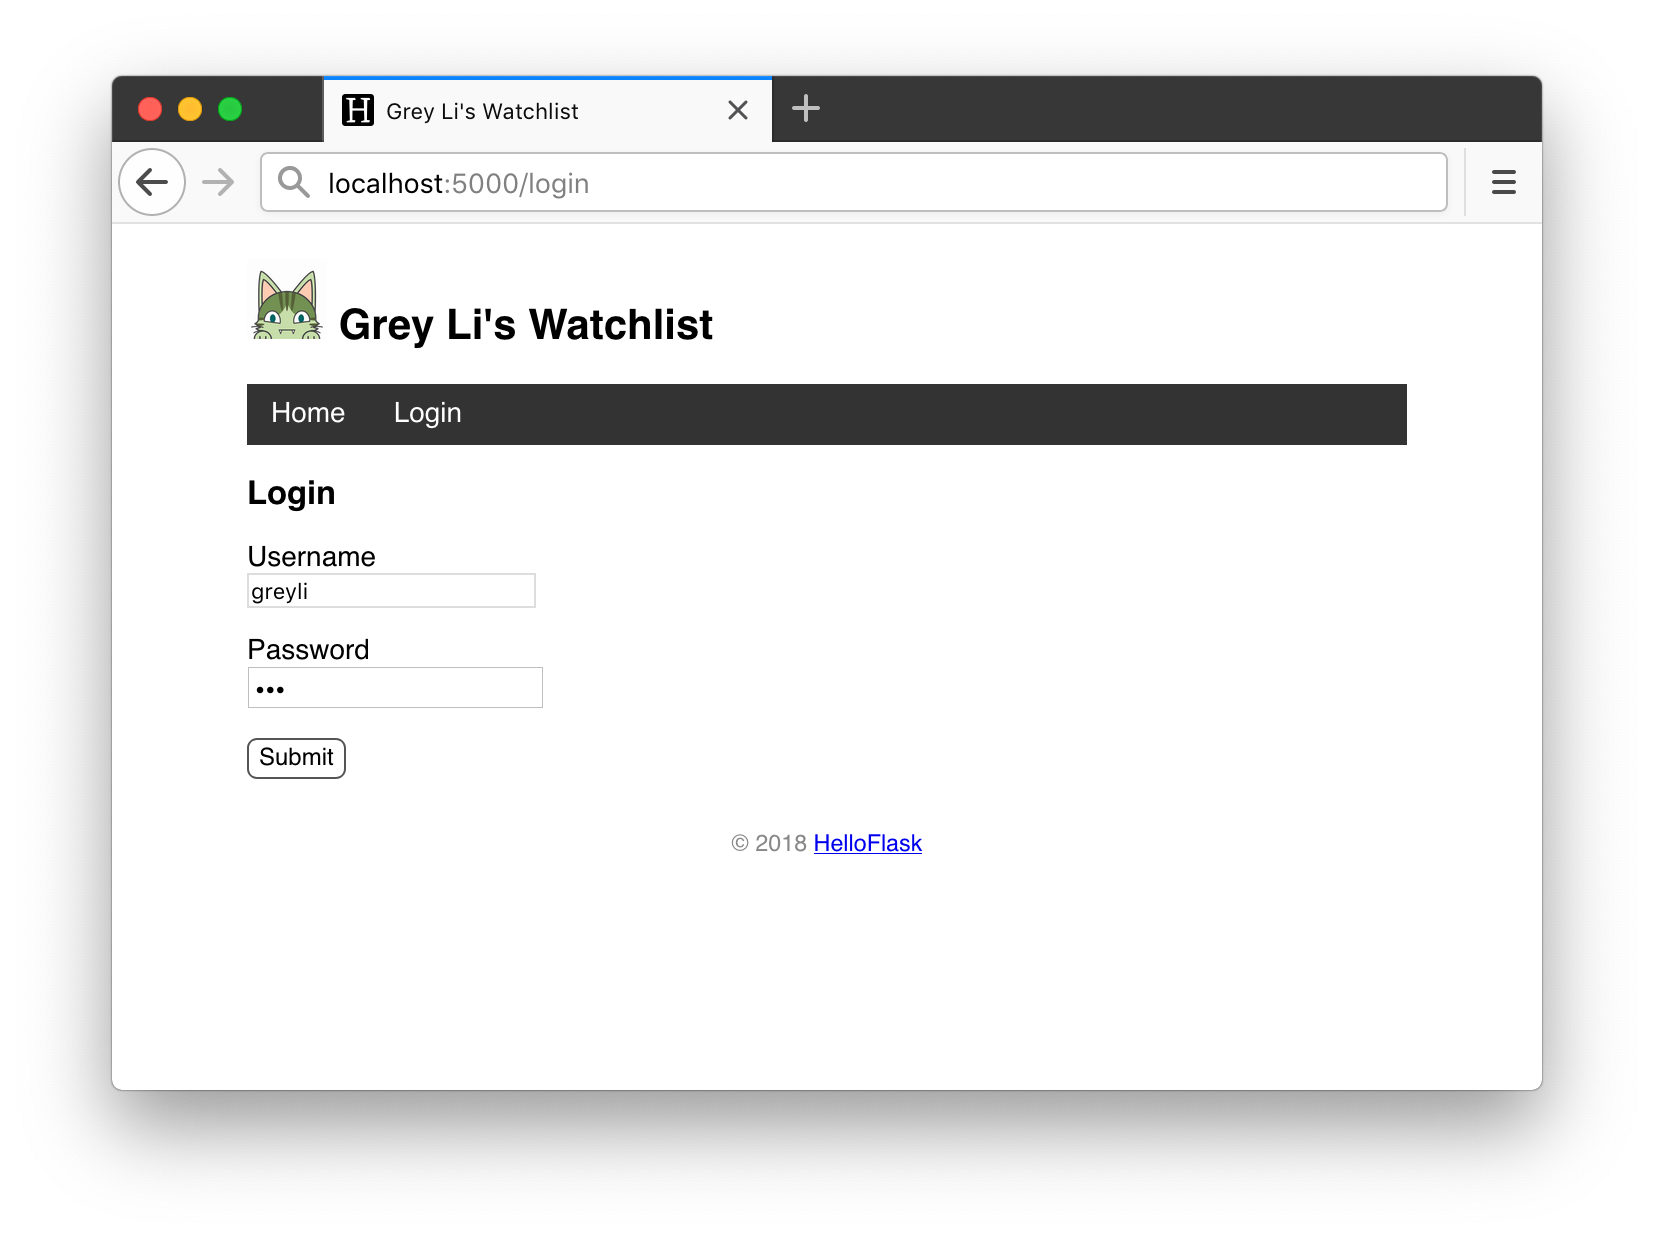
Enter the username and password on the login page:
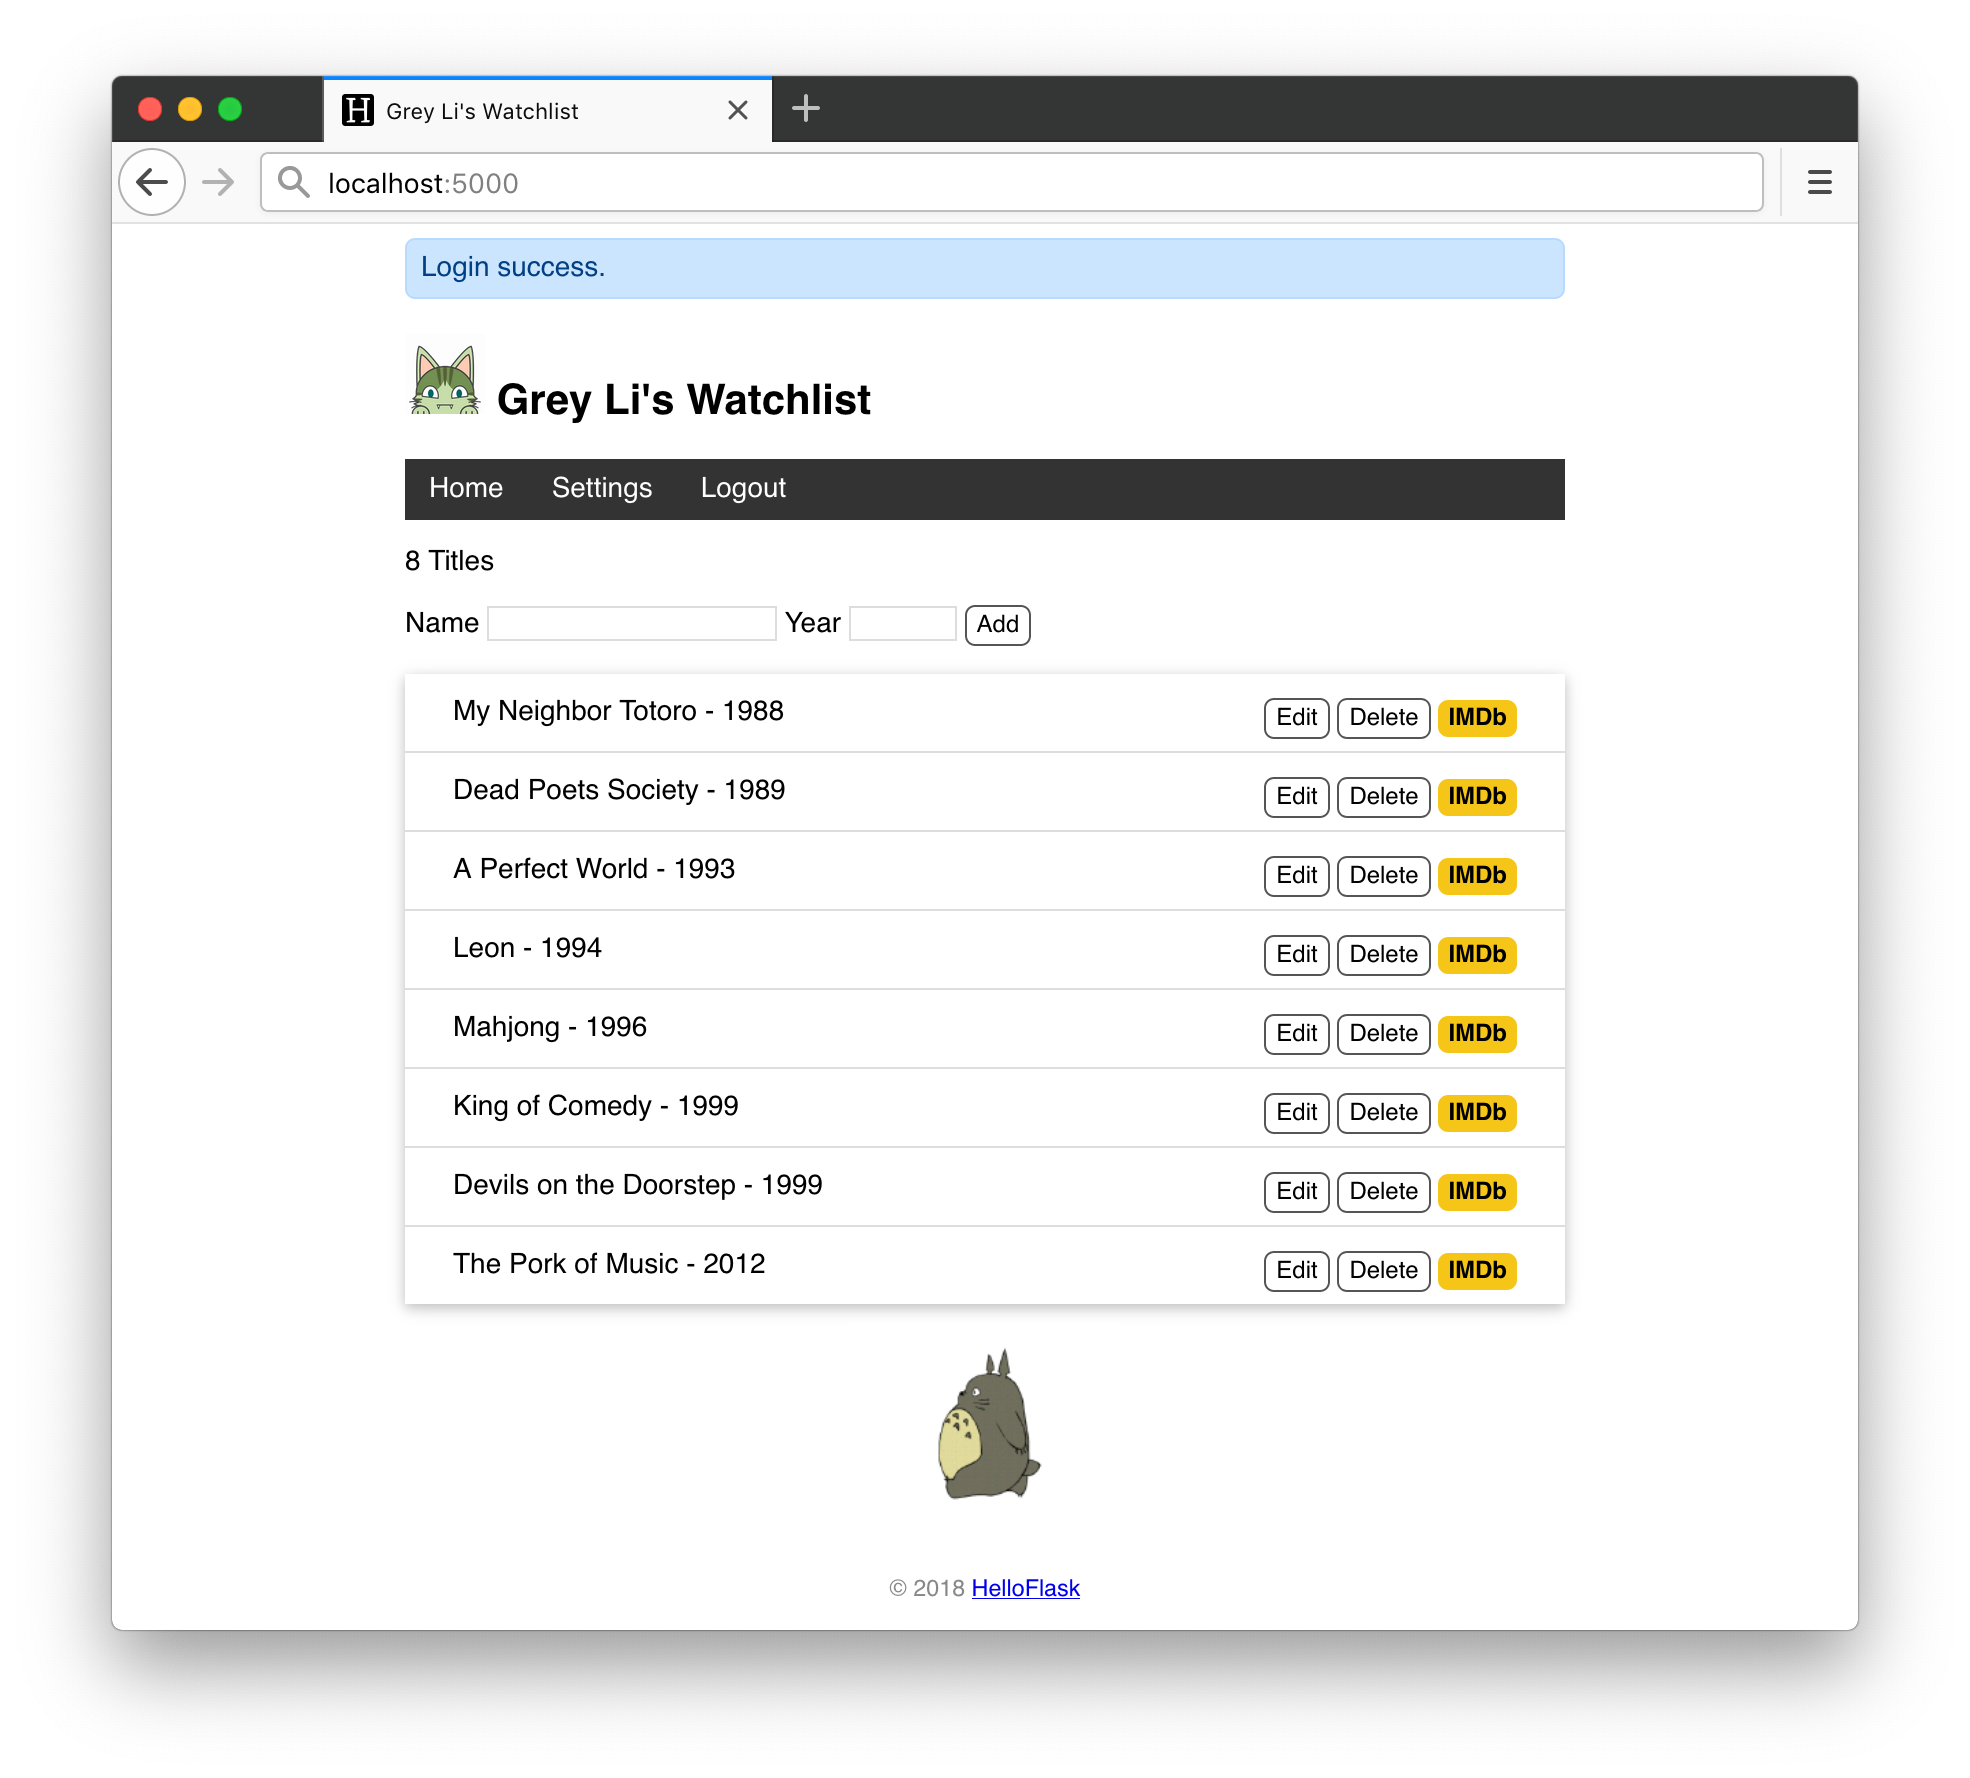
After logging in, the home page looks like this:
Chapter summary
With authentication in place, the application's core functionality is complete. Before we finish, commit the code:
$ git add .
$ git commit -m "User authentication with Flask-Login"
$ git push
Going further
- Read the Flask-Login documentation for more details and usage examples.